
Living in areas like the Midwest of the United States brings with it hot fun summers and cold brutal winters. For pool owners, closing down our pools to be winterized for the winter season is both sad and can be a pain in the butt. This winterization process is a necessary evil though because pipes completely filled with water below ground will turn to ice, expand, and then burst during the winter freeze. Below, I’m going to give you a step-by-step guide on how you can blow out and cap your main drain for the winter.
1. Drain Pool Water Below your Skimmers and Return Jets
Lower the water level in your pool below the skimmers before attempting to blow out your main drain. If you aren’t exactly sure what your main drain is, you can check out our article here about main drains. This is accomplished by removing water through the “waste” setting on your pool pump until you reach the desired water level below the skimmers. For a more in-depth guide on how to lower your pool water, you can check out this article.
2. Winterize your skimmers and return jets
This will be a similar process to blowing out your main drain with a few different steps. I’ll have an upcoming blog with a step-by-step on how to do that which I’ll update on here shortly.
3. Determine how your main drain is plumbed
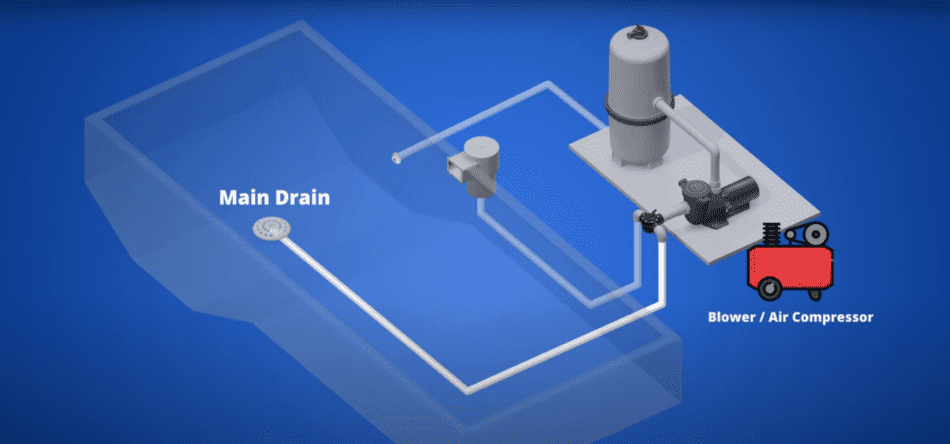
There are two common ways for a pool main drain to be plumbed. The first way will have your pool main drain plumbing lead directly back to your pool equipment. The second way your main drain will be plumbed into your skimmer. You can see the two examples below:

You can see in the above example the main drain is plumbed directly to the valve that connects directly to the pool pump and is separated by a valve.
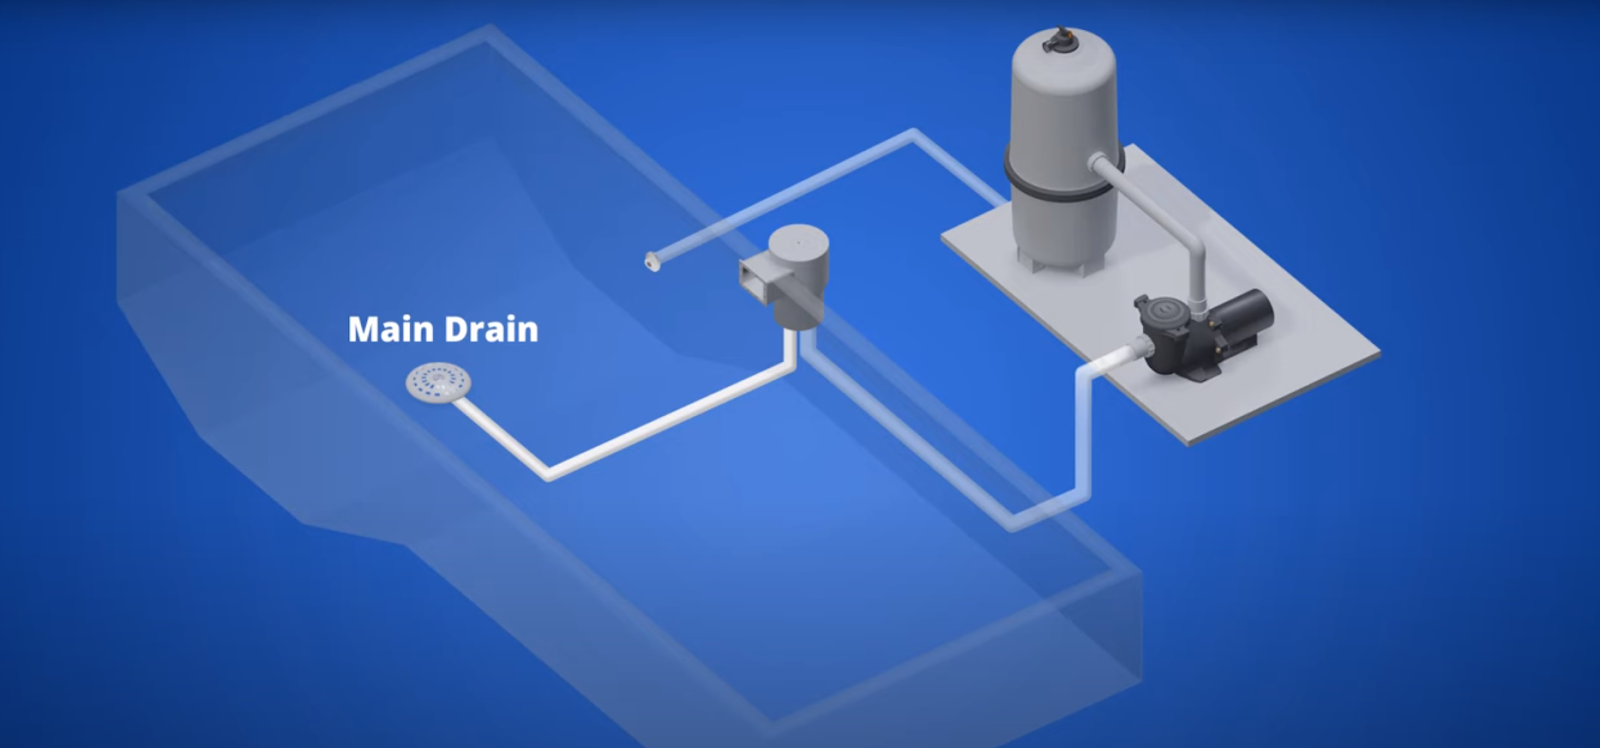
In the second version, the main drain is plumbed directly into the skimmer. This skimmer has two holes in the bottom, one for the main drain and the other leading to the pool equipment.
How to Blow Out the Main Drain (Directly Plumbed to Equipment)
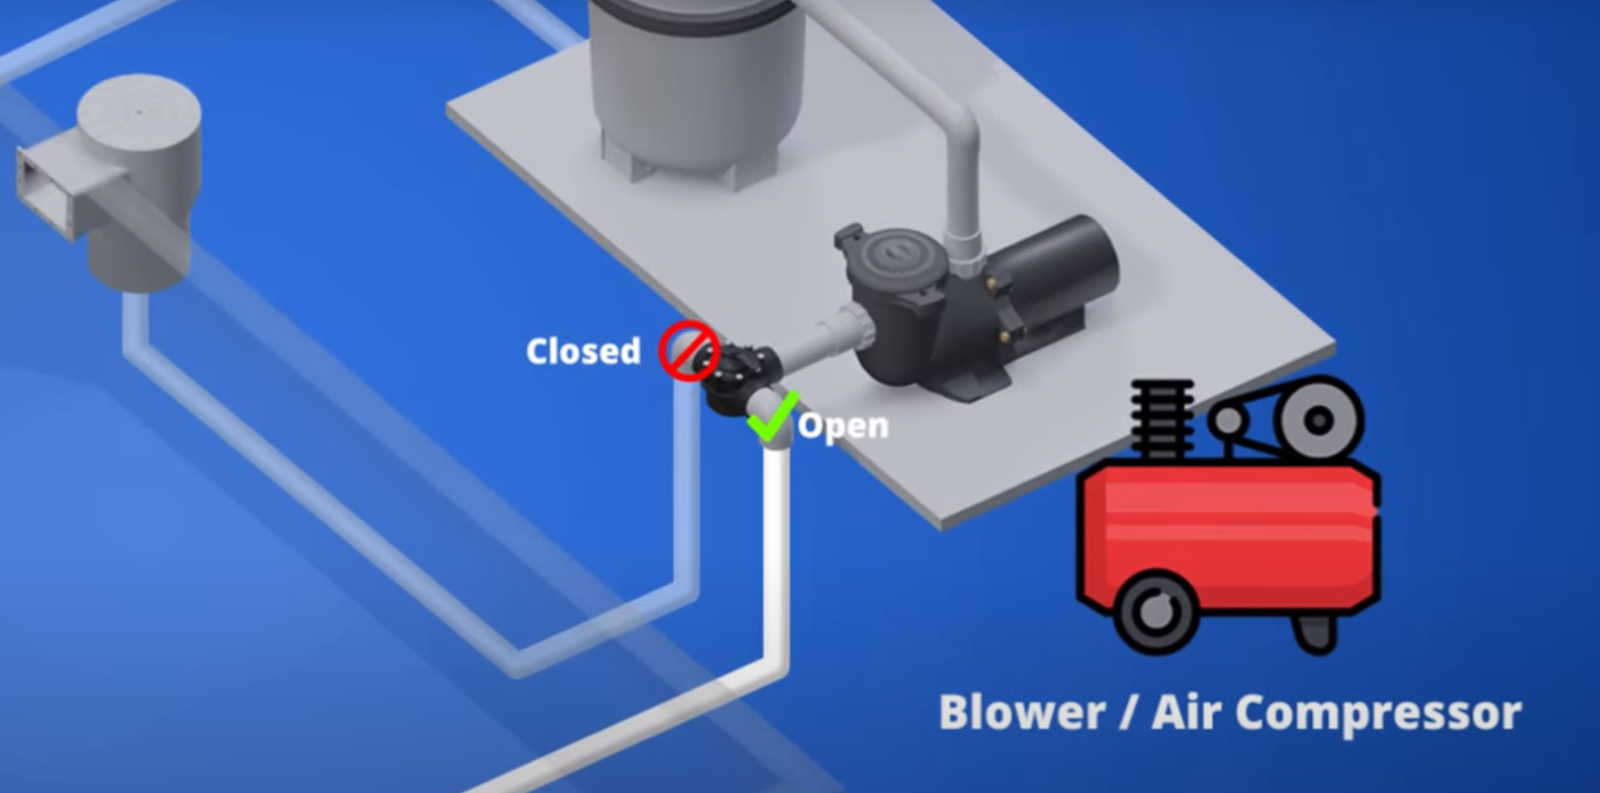
1. Isolate the Main Drain Line
The valve that leads directly to the pump needs to be in the closed position for all other lines except for your main drain line. You will need to turn the valve until you have reached the correct position.
2. Remove the Pump Lid
In this process, compressed air needs to be pushed through the main drain line. To accomplish this the lid for your pump needs to be removed so that the air compressor hose can be placed into the pump to push air through the main drain pipes. You have to have an air compressor to get this job done, if you don’t have one, well, as a DIY guy you should get one and you can check this air compressor here.
3. Insert blower hose into Pump
The blower hose will need to be placed into the suction cup of the pool pump. This is the side that leads to the valve of your main drain. Do not insert the hose into the side that leads to the filter.
4. Turn on the air compressor
Turn on the air compressor to begin pushing air through the main drain line.
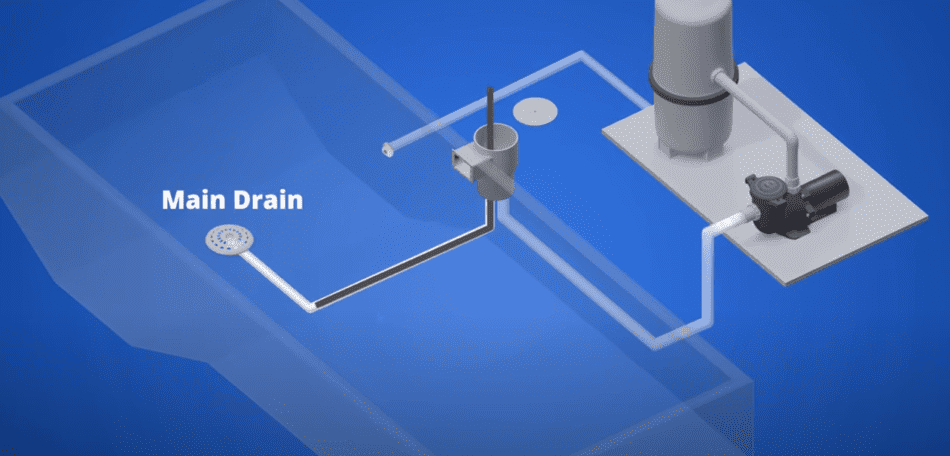
5. Watch for bubbles coming out of your main drain inside the pool
Once bubbles start coming out of the main drain line, we will let the air push through the main drain pipe for 30 seconds. During this process, if you see bubbles coming out of any other pipes it is possible that you need to go back to step 1 to see if you isolated your main drain line correctly.
6. Create an Air Pocket Inside of Main Drain Line
After 30 seconds of bubbles coming from your main drain at the bottom of your pool, close your main drain line on the valve coming from your pool pump. This will leave a pocket of air in your main drain line.
7. Turn off your blower or air compressor.
After the main drain line has been closed, turn off your air compressor and the job is complete.
How to Blow Out the Main Drain (Plumbed into a Skimmer)
1. Locate the Correct Line
In this plumbing configuration, the skimmer will have two pipes connecting to the bottom of the skimmer. The pipe furthest away from the pool water plumbs back to your equipment. The line closest to the pool water will be your main drain line also called an equalizer line.
2. Choose an Option to Winterize this Main Drain line.
We will not need to blow water through this main drain pipe to create an airlock. Here we can simply cap the pipe with a winterizing plug. These plugs are extremely useful to a pool owner and I recommend having them around the house. The water in this pipe will freeze up and through this pipe and not out so we can use the plug here to create the seal as there is already air inside of the pipe from lowering the pool water below the skimmer.
3. Insert foam rope or backer rod (Optional)
This is more of an insurance policy to feel confident your pipes won’t have any issues during the winter months. The foam rope or backer rod will compress and absorb the ice expansion which will mitigate the ice from expanding outward. After the foam rope or backer rod is inserted, you will still need to cap the line as detailed in Step#2.
The size of the foam rope you can use should be around 5/8″ in diameter. You can find that here on Amazon.
This DIY project can seem a bit daunting but learning how to blow out your main drain on your own can really teach you a lot about your pool system. This knowledge can help save you a lot of money in the future solving small issues in the future with your pool plumbing and equipment without needing to call a professional. I believe every pool owner should be as familiar as possible with the plumbing in their pool. Annually closing and opening your pool yourself with give you that through the repetition of the process over the years.